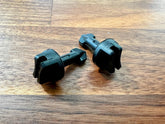
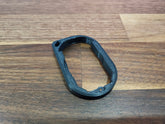
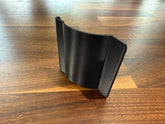
The OpenSourceEV Ultimate MagSafe Charging Power Kit V2 for the Rivian R1T and R1S is the companion product to the Pad Kit. It allows you to use the OEM plug that powered the stock wireless charging pad. It includes the following:
Version 2 of this product no longer requires assembly. It's now a crimped, solder free, Molex to barrel adapter. It uses an OEM wire to wire adapter and genuine TYCO GET automotive terminal connectors. It's now a solder-free plug and go experience.
The dual USB Power block is rated at a maximum of 18W per port - 36W total. (12V at 3A)
If you're planning to use the OEM Apple MagSafe pads with this product, you'll also need a USB-C to USB-A adapter. Unfortunately, they tend to be a little picky about what adapter works. We've qualified one and sell it here.
This product has not been tested with other aftermarket Rivian charging setups. It is use at your own risk.
This is an excellent functional design. The connection design needs help. However unless you solder, expect to invest time in tinkering to ensure a stable power connection. Soldering requires two welds in about 1/4” of space. A few ideas for OpenSource. A) Design a pre assembled / soldered version. B) design a push to connect connector. C) Design a simple pin that can be connected to barrel connector with a heat gun solder joint and directly insert into the Rivian connector.
I have a 3D printer and even bought the USB adapter from Amazon - (TFTL!). It took me two prints and it got "ok" but my printer isn't large enough. So I'm returning the Amazon USB and ordering all through you (print included). Thanks for being open source an keep being awesome!
I went the solder route and it was great, except that the 12v barrel connector was not connected well to the board. This caused an intermittent loss of power. Added a small plastic shim to the case after adding a dab of solder and we are up and running.
At a minimum it would be nice to get some kind of instructions.
I know what I was doing, but still had to be sure and use outside equipment to install correctly.
On the inside of every box that we send is a stamp that directs folks to the installation instructions page: https://opensourceev.com/install
On that page are instructions for the installation of this product. It's located here: https://opensourceev.com/blogs/install-instructions/power-kit
I have to agree with the other reviews that this install is a tight fit, and you definitely need to plan to route the DC connector into the little hole in the back of the console. I went with the screw in wiring, and found the pre-stripped/tinned leads were too short to bottom into the connector. Since there is a LOT of slack in that cable, opted to cut and strip new leads that were a touch bit longer. Helpful to have some electrical tape to clean up the work/wiring and some small pieces of double back mounting foam to hold both the power block and OEM power connector in place during final install.
Overall a good solution to keep the USB-C ports open in the center console. One star taken off as the install was a bit more finicky than was expected.
Thanks for subscribing!
This email has been registered!