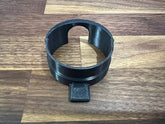
Ultimate MagSafe Pad
To install the Ultimate MagSafe Pad, you first have to deinstall the OEM wireless charging pad. Follow these steps to do so:
-
Remove the rubber pad. It has four little retaining feet toward the front of the truck, at the bottom / front of the bowl, and two protrusions at the rear that are designed to slip into openings. It is also double-sided taped down.
Pull back the front of the front most of the rubber pad and peel it out of the retaining feet and off of the double-sided tape - up and slightly backward.

- The OEM wireless charging pad is next. It is installed into a plastic assembly, and both come out together. Both are secured to the truck via three tension clips in the front, and a similar slot / opening setup (like the rubber pad) in the rear.
To remove, insert a trim tool (or similar) into one of three clips at the front of the pad and gently pull toward the rear of the truck while lifting the pad upward. Be careful to not let them catch just on the wood surround. You may need to bend them back just a bit to clear it.


- Once it's dislodged as shown in the last photo - DO NOT PULL IT AWAY. Instead, gently rotate it over and disconnect the power plug on the back.

Once the OEM pad is installed, you now can reinstall the OpenSourceEV replacement in roughly the reverse order.
Before doing so, insert the MagSafe pads into the holder. Be VERY careful to not force them in. The surround rings use the pad for structural stability and are somewhat fragile without pads installed.
Now that the pads are installed, you can either install the Power Kit (if you are using this) or proceed to installing this product if you plan to use the center console outlets.
- Orient the shelf with the two protruding notches toward the back of the truck, and angling them downward, start by inserting just the tip of each into the receptacle that they are designed to slot into.
- Push the shelf backward and then lower the front of it. It should go in how the OEM charger came out.
- Push downward, making sure any wiring is out of the way and not caught. Do not force it. The very front of the shelf has a notch that clicks into place where the OEM wireless charger assembly did.
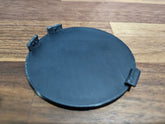
- Install the TPU rubber mat. Make sure that you push down along the entire perimeter to seat it correctly.


